

Introduction: Belt sanders become used in wood cleansing such as paint removing from furniture or a surface. That surface can be your wooden floor too. Not at all belt sanders are good in quality and, therefore, you need to do some ground work to get the best belt sander possible. In that way finding a good brand is important though not all product of a particular brand is good. It means getting a good belt sander requires patience and some assessing and contrasting works among a list of products.
But whatever the product is, you must admit the utmost necessity of maintenance. This is same in the case of belt sanders. Depending on the types of the sanders, you need to clean that in a different way. For an example, you should not clean a big belt sander used in floor stripping in the same way as a household chores performer small belt sander. Yes, the basics are still the same, but methodology might need to be modified. Again different belt sanders from different brands have the special user manual and maintenance guide. So depending on the specific belt sander you are using, the cleaning process should run.
Steps to Clean the Machine:
Here are some steps that you can follow while cleaning your belt sander. You can consider all those as general advice and even a novice non-professional user of a sander machine can do machine cleaning in this way.
- At first, unplug the machine from the electric cord. This is crucial before start working to ensure you are not connected with anything dangerous. Yes some part of the cleaning process is not risky at all, and anyone can do that without unplugging the tool, but that is not recommended. Sometimes it might be boring for you to unplug if the connection comes from an upper position from the roof, but still the advice persists, ‘don’t start cleaning unless the electric line is unplugged.’
- At the next stage remove the bag and clean that in your way. There is no complexity in there. Do it immediately after unplugging the belt sander.
- Now use some compressed air to make the surface moisturized. This can be great before start to cleaning the surface.
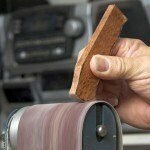
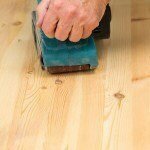
- When you will find the surface properly moisturized with the compressed air, take a wet cloth to rub that gently. Before start rubbing don’t forget to wet the cloth in a mild soap solution. Gently keep rubbing until you all the areas are covered. Be aware of water usage, cause motor might start malfunctioning if remain adhered with water solution.
- Do the same process of rubbing for the wire of the belt sander. This will clean the dust from the wire and offer you a fulgent look.
Why Through Cleaning is Important and How to Do:
Cleaning the machine is important for numbers of reasons. For an example, if you want to keep the machine in a glaring look for years after years, there is no way without cleaning it in a regular basis, at least once in a week. If you don’t clean the machine, eventually the rust will use the environmental moisture to ruin the metallic frame of the machine. This will make the metal or steel dented and the appearance of the overall machine will decline sharply in a shabby look. So it is understandable that to keep the original look for a long time, cleaning the belt sander is important.
You should clean the belt sander to get enduring service from it too. For an example, if you don’t clean the electric wire, it might start decaying and suddenly would stop working, dragging you to rebuy a new wire with a new plugging device. So if you want to make that expense as later as you can, don’t show lethargy in cleaning process of your belt sander.
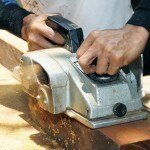
After the work, you might find some paint or removed object adhered with the bottom part of the sander. This is the area where the roller sticks in to roll over the belts. After each day of working, you should clean that too to ensure the roller will roll smoothly and the belt will remain on the line. To keep the belt in line or to adjust that in an appropriate direction there are steps to take. To do that, you just need to release the lever to get the belt out and then make the rough surface of it clear before refitting.
Conclusion:
After reading this article, you can easily understand how important it is to clean the belt sander and how someone can do it. Yes, the operating system of sanders might vary a bit depending on the brand it produces, but still the cleaning process in not that different. Try to follow the tips and steps mentioned here before proceeding to do cleansing works and in that way, you can get enduring support from your machine.
Related Posts
-
 How to Change a Belt on a Belt Sander ?
-
 How to Adjust & Fix a Belt Sander ?
-
 How to Sharpen a Knife with a Belt Sander ?
-
 How to Use a Belt Sander on Hardwood Floors ?
-
 WEN 6502 Disc Sander Review
-
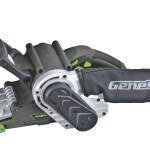 Genesis GBS321A Belt Sander Review
-
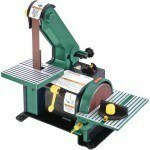 Grizzly H6070 Disc Sander Review
-
 Black & Decker BR318 Belts Sander Review

